Sunday, August 16, 2020

My Rusty Beater: Update #3

 Replaced oil pan

My beater was starting to drip some fluid in my driveway, I believed it to be oil (another candidate would be P.S. fluid).

Click here for my original post on this car.
Click here for update #1 on this car.
Click here for update #2...

The oil pan was original to the car and was wet with oil, and quite corroded. Of course oil can get blown around from driving, and it can be hard to locate the source of a leak. The plan was to clean oil and grime from the block, replace the pan and gasket, and monitor for anymore fluid to appear. I bought a new pan off of Ebay for $26, it came with a cheap gasket. I also got a tube of Hondabond HT (a hi-temp RTV) for $12. After some consideration, I decided to get a Fel-Pro brand gasket ($25) rather than go with the cheapie I already had.


Old and new oil pan


Exhaust flex-pipe already taken off. Removing the aluminum shield for the flex-plate, transmission side, to get at all the oil pan bolts.


The Honda factory does not use a gasket. They apply a bead of hondabond all the way around and torque to spec. No doubt that is cheaper than installing a gasket. The heads of the bolts on the pan were quite rusted, but I managed to get them all off, then use a pry bar to separate the pan, from the block.

Except: there are 2 studs with nuts used in the center of the pan, front and back. ( no doubt to guide the pan on without sliding it around on wet RTV. this is a photo of the surviving one. The other (the front one) would not budge, and by the end, I had rounded the nut pretty good. So I decided to cut it off, remove the pan, drill it out, clean the threads, and replace with a bolt


Old pan off, you can see the oil pick-up and the flex plate


Ready to drill out this frozen stud, and replace with a bolt.


Only big mishap:
While I was drilling it out, I snapped off my titanium coated drill bit, inside the stud.
This was the face I made....


Now I had to pretend this fastener didn't exist.
I put a bead of Hondabond across the span, where the missing stud was, on both the top, and bottom, of the gasket. I tightened all pan bolts to 100 inch pounds (roughly spec). I also had to modify my tightening sequence, as the busted fastener was #2 out of 18. I then let it cure for 3 days. It seems to be working so far.

A side note: I actually took my angle grinder and removed some material from the inside of the aluminum shield that straddles the pan, because the thickness of the gasket threw off fitment. I tightened the shield bolts to 20 ft. lbs. as the receiving threads of the transmission housing were aluminum, (guessed on this, don't know the factory spec).


Fel-Pro gasket, pan, and a tube of Hondabond HT


the white shape in the center is Hondabond forced out the hole in the pan where a bolt should be.


Finished product - new oil pan installed 


Cost of parts for this job

Oil pan - $26
Fel-Pro gasket - $25
Hondabond - $12
hardware - $8?
Total - $71


Just some Tool Porn

My favorite drawer: socket drives, extensions, adapters, breaker bars, and cheater pipes.


Sunday, July 26, 2020

My Rusty Beater: Update #2

Replaced: dented front fender, hood latch, headlights


In order to replace the fender, the following needed to be removed: front bumper cover, one headlight, and the right rocker panel. Here was a "kill 3 birds with one stone" situation.


Old parts off, ready for new


Fender

When I bought this car, it had a dented front, right fender. It had always been my plan to replace it. So I finally bought a new, primed fender from Ebay for $57. It showed up with a few small dents in it. I complained to the seller, and since they did not have another in stock, they refunded my money, and said "keep it"...not asking for it back. I decided to still use it, as they were small dents, and it was an improvement over what was on the car. I painted it with rattle-can, gloss black rustoleum ($7) and it looked fine. I also painted the grill, satin black. Which after 20 years, was simply faded, unpainted plastic.


Dented fender, before and after


Hood Latch

Since the bumper cover was coming off, I replaced the hood latch, ($28) which has a contact switch, and electrical connector. This tells the computer that the hood is closed, and allows the car alarm to be armed. Since the old one was very dirty, and gummed up, it was not telling the computer that the hood was closed, So I could lock the car with my fob, but not set the alarm. The latch was easy enough to access, with the bumper cover off. The new part fixed it. Now... when locking/unlocking with the fob, the parking lights flash, indicating that the alarm is working.


New and old hood latch


Headlights

Since I had to remove one headlight anyway, I decided to get a new aftermarket set from Ebay for $75. I had originally restored my headlights, but even so.... these looked better, being new. I also added a bead of silicone caulk ($4) around the housing/lens union, as this was chinese made, and I decided to take charge of quality control, to prevent the occurrence of condensation.


The brand new headlights, seen with the patina paint, contrast nicely IMO


Total cost of parts in this post - $121

Coming up next: Oil pan and flexpipe


Saturday, July 11, 2020

My 2005 Scion xB: Update #2


Complete exhaust system replacement


2005 Scion xB


15-year-old, original exhaust, time to go.....


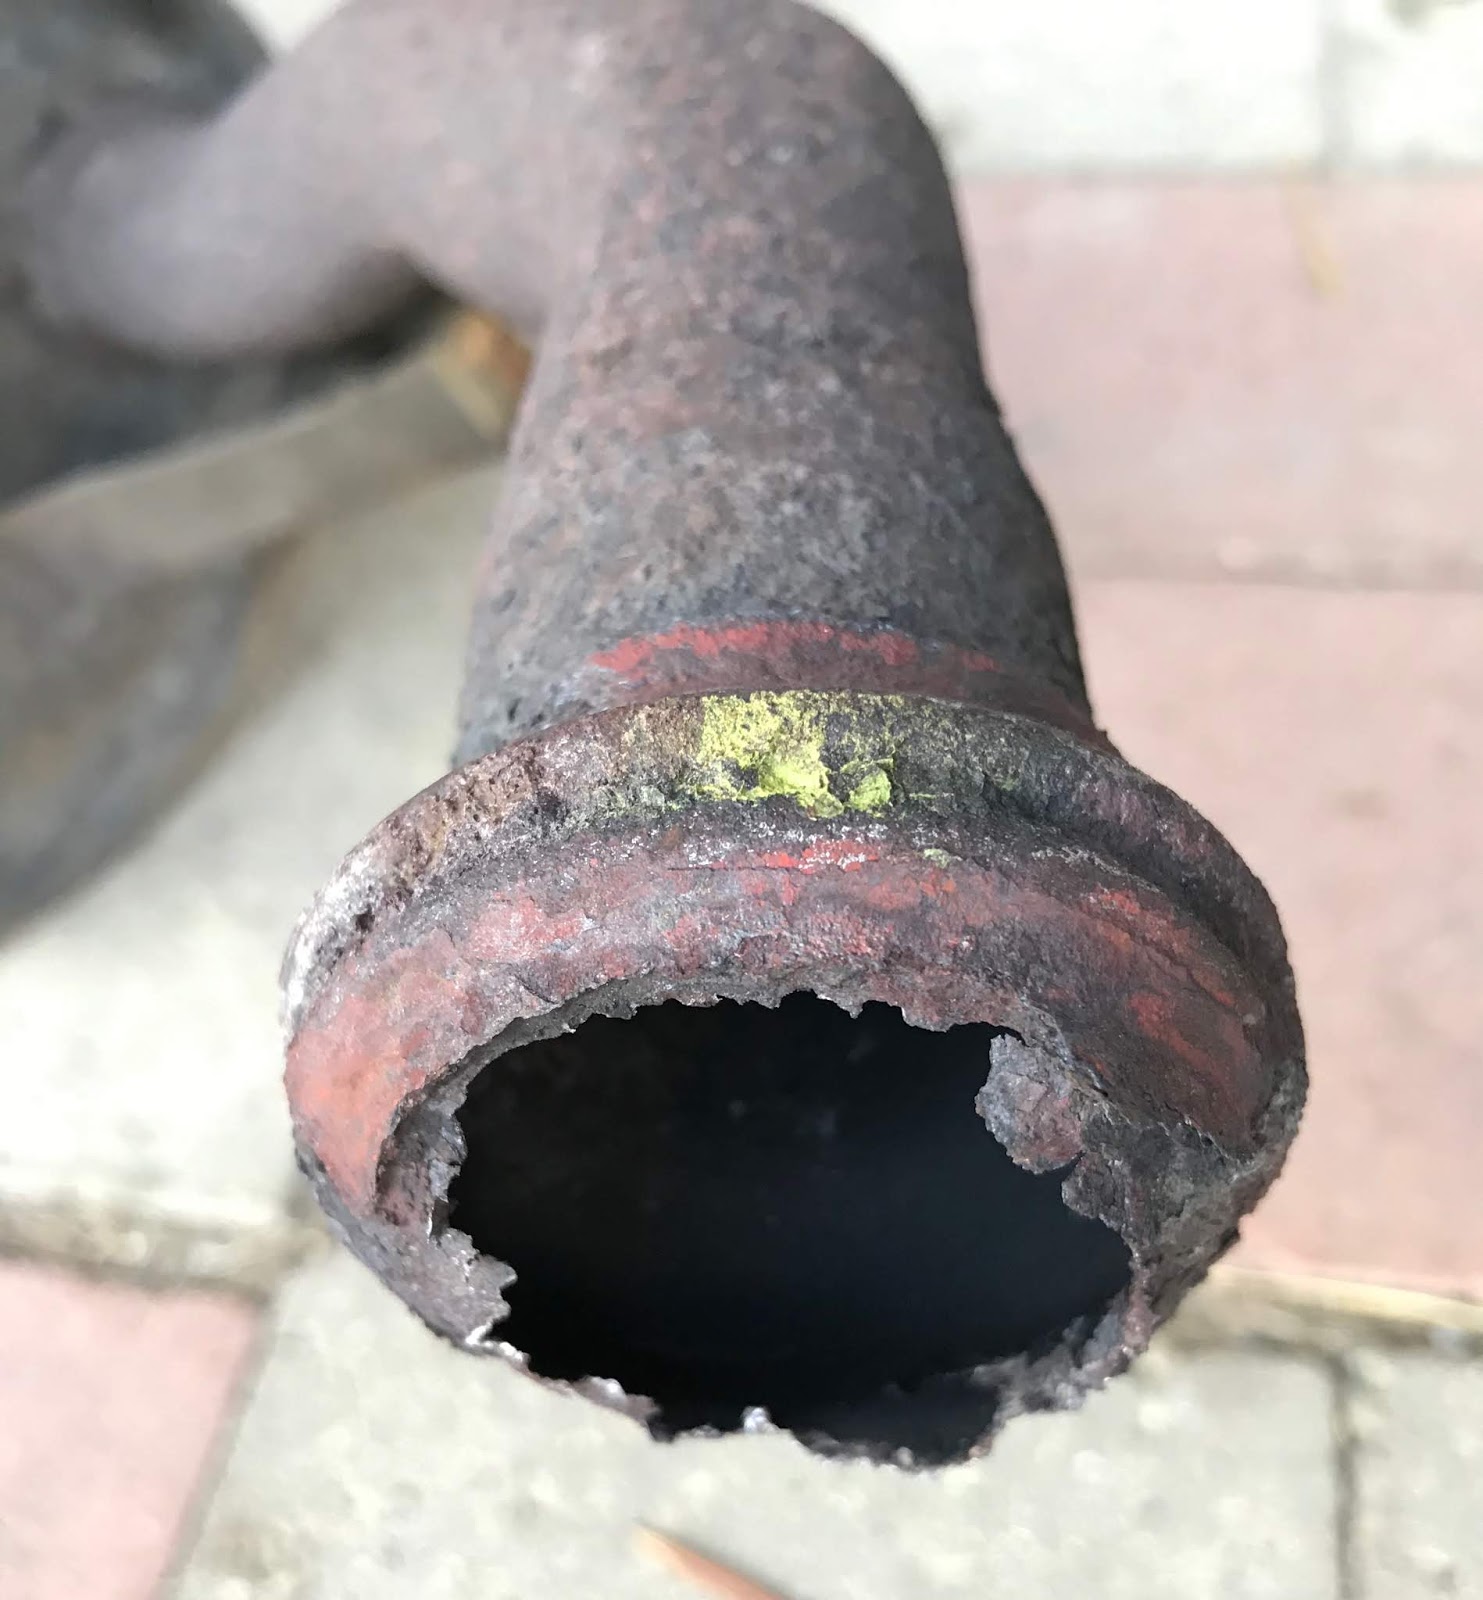
I noticed about 6 months back that my car idled louder than it had before, so I figured a hole rusted out somewhere in the exhaust. I got it up on a lift, and felt exhaust puffing out the top of the muffler. So I ordered a direct fit Bosal muffler. However upon trying to remove the old muffler from the rest of the piping, it snapped off just upstream of the muffler connection. (The whole pipe was probably rusted thin.) Ok,... I guess I'm replacing most of the exhaust. I ordered the rest of the system from the downpipe to the muffler. So I got downpipe, cat, resonator, muffler, hardware, gaskets, and piping for about $350 total.


Old muffler visual inspection


On disassembly, the pipe broke, on the upstream side of this connection


The OE stainless steel muffler lasted about 15 years before the seam came apart.


The old spring bolts, between the header and downpipe, wouldn't budge with my big breaker bar. So I bought a 1/2" drive, 1200 ft. lb. impact wrench, from harbor freight for about $280. Worked like a charm, and now I will have this tool handy for other stubborn bolts down the road.


The old exhaust parts


The first round of new exhaust components - $350


First attempt ended up being a "manufacturer fail."


The Bosal muffler was fine. However....The center section made by Eastern didn't fit right (supposed to be direct fit). It was a subtle thing. I didn't pick up on it right away. The spring bolt connection (female end) was not made to the proper depth, so it leaked, and was louder than it should have been. I wouldn't be able to see the nature of the problem, unless I mocked it all up, off of the vehicle.

Second try at new exhaust system


I decided, if my exhaust manifold was going to come off, for a mock-up to check fitment, I would replace it. So I found a brand new, 4 into 1, DC Sports-type, stainless steel header, for the bargain price of $98, from some private seller, on Ebay. Not sure what brand it is, but it is SS, nicely welded, with thick flanges.  Plus I ordered a downpipe, cat, resonator, and pipe to the rear axle from Davico ($294), to use instead of Eastern, keeping the Bosal muffler. Confirming my suspicions, the Davico was made with a deeper receiver on the downpipe. It looked like it would work fine, and it did.


the 16-year-old OE manifold with the new aftermarket header. 


I'm using stainless steel zip-ties to hold the shifter cables away from the heat.
There is no heat shield, and the primaries take up more space than the OE


The car does sound a little throatier now. Especially at cold start. Probably the header. Fairly factory sounding though, not too loud.

The new header is NOT meant to be a performance thing. It's just the cheapest option for the factory manifold I could find. The rest from the header-back is just meant to be factory. Even though I do have a short ram intake (and now the header), A performance cat-back alone, would run me at least $750, so I decided to pass on that, since we are not talking about any big power numbers.

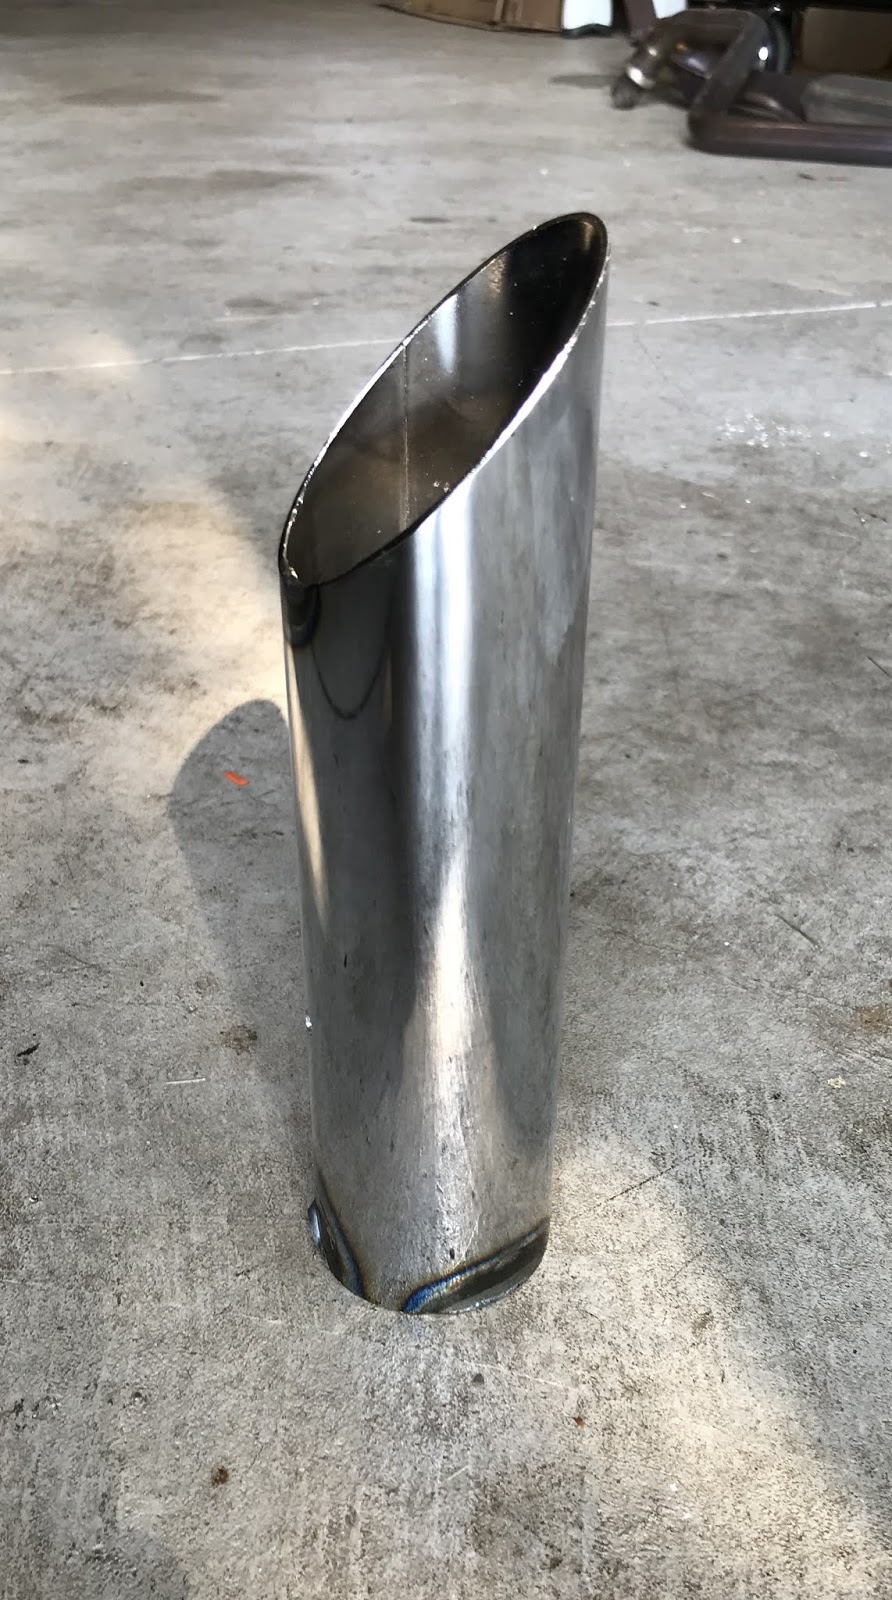
I happened to have a chrome tip from an exhaust on another car, so I am using this to extend the tailpipe past the end of the bumper cover. You don't want exhaust gases released underneath the car. I had to get someone to weld it on, as I don't weld yet, but I will be acquiring that skill soon.

Project = success


Costs
Header   $98
Cat-back   $295
Muffler  $115
miscellaneous hardware  $15
(OE cat recycle  -$70)

Total - $453


Wednesday, January 29, 2020

My Rusty Beater: Update #1

Remove and replace gas tank (for starters)


click here for my original post on this car

This all started with a "check engine" light.
The code was P1456. --large leak on tank side of evaporative system. Thinking it was something small, I started to investigate (yeah.. not small). A mentor of mine pointed out that he could smell gas under the car, and could see wetness on a tank seam. Yup... that could be the cause.


New tank on subframe almost ready for reinstall


2000 Honda Accord Coupe EX beater


Step-by-step for this job + extra things I had to do, as I came across road blocks:

  • Disconnect electric connector to fuel pump
  • Drop exhaust system
  • Remove filler neck cover
  • Disconnect rubber filler and vent hoses, connected to filler neck
  • Disconnect vapor lines by charcoal canister
  • Disconnect plastic "quick connect" fittings to steel supply and return, fuel lines (not gonna happen. So....Cut nylon lines at fitting, and replace with 1 new "quick connect" fitting. Second fitting replace...fail, had to buy OE replacement return nylon section.)
  • Disconnect electrical connectors for rear wheel speed sensors
  • Remove heat shield on underside of rear subframe
  • Disconnect parking brake cables from caliper and support brackets
  • Disconnect rear brake hose from support brackets
  • Disconnect rear calipers from knuckle, hang them on spring
  • Disconnect bottom of struts from knuckle (not gonna happen, seized bolt on drivers side. So....drop subframe with strut attached. Cut though connecting bolt on both sides of bushing, with hacksaw, and muscle it out, ...took forever)
  • Remove 4 subframe bolts
  • Drop subframe using floor jack
  • Unscrew flange to remove in-tank fuel pump (not gonna happen. So....drill out ALL hardware for fuel pump and vapor recovery system)
  • Syphon out all fuel from tank..........At this point, I am free to make sparks, and use a torch, if need be.
  • Disconnect 2 metal straps holding tank to subframe (not gonna happen. So....cut through straps with hacksaw, and sawzall through 2 rusted bolts and replace)
  • Remove remains of metal straps, and replace with new ones
  • Remove and replace tank
  • Install new fuel pump and existing vapor recovery unit in new tank. (see picture #1)
  • Install subframe and reattach basically in reverse of steps above.


Decided to expand job to include the following:

  • Replace fuel filler neck
  • Replace fuel pump (since I was in there)
  • Replace rear struts and springs (after bolt fiasco)
  • Replace all steel fuel lines that run from engine to the nylon lines
  • Replace 2 steel brake lines going from proportioning valve to rear brake hoses.
  • Make all new metal supports for lines, and add new plastic clips (old ones are long gone).


Cost of parts for this job:

  • Tank $165
  • Filler neck $37
  • Fuel pump $99
  • Rear struts, loaded $81
  • new OE shock bolt $4
  • Steel pre-bent fuel lines $179
  • "Quick connect" fittings $10
  • Valex Racing braided stainless brake lines $135
  • Plastic line holder clips $33
  • OE nylon return fuel line section $64
  • Miscellaneous $50?

Total $857


Top of old tank
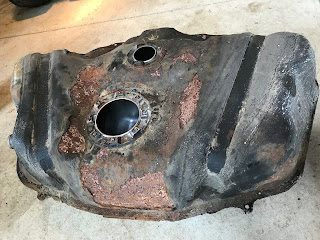


source of a least one leak.


New tank installed on rear subframe


A side note:
The underside of this car is so rusty, that 50% of all fasteners or bolts that need to be turned for disassembly, snap or crumble, and need to be drilled out. Odds are that the existing threads will not be saved when doing so. Thus, this car has given me the opportunity to try my hand at "tap and die" work. Not easy, as the spots can be upside-down, in hard to reach places. (no luxury of a drill press here.)

Interesting point...if you gain some experience tapping threads, you are more likely to be able to save rusted hardware, because if you can budge a rusted nut or bolt, you can possibly save it, by turning it with the same back and forth cutting motion, used when tapping threads.


I had to cut the old "quick connect" fittings apart with a hacksaw and pry them off. Because this little bit of rust underneath, rendered them impossible to separate.


This high pressure fuel line fitting on the firewall
took a boat-load of torque to crack loose after 20 years.


Fuel and brake lines

My fuel and brake lines were in raggedy condition. Since I had to almost ruin them, to separate the metal and nylon, and they looked to be on their last legs anyway, I decided to go ahead and replace them all, as this would be the time. I drilled and tapped holes for my new homemade supports, and added some modified, orange, Ebay plastic line clips.


fuel and brake lines by firewall, before...


...after


middle, before...


...after


at rear axle area, before...


...after


I had to drill out all the old hardware holding the fuel pump, so that I could restore and reuse the metal flange that holds the pump against the gasket. (that was the only part that was staying) the Honda dealer wanted $42 for that simple metal part, so I decided to rescue it.

Retrieving fuel pump flange to restore and reuse.


Bottom of filler neck looked pretty sketchy, so... since it's cheap,...remove and replace.


Old and new fuel pump.


New lines seen from below. 


New tank installed seen from below


Mission Accomplished:

This was a job that I was almost ready to bail on, when I first realized what needed to be done. I'm glad I went forward. This job was all done on jack stands, without a lift. It was mostly labor, and the replacement parts for this car are cheap, and plentiful (mostly). I learned a lot from this exercise in "remove and replace" and I feel that my competence has gone up a notch.

My guess is, If all this work was done by a professional shop, the bill would come to about $4,000-5,000 - parts and labor (not even using OE). Seems like a bargain, that I did it for $850.

The check engine light never came back. I passed emissions, and have current tags on the car. Even if this had NOT been the cause of the code, it needed to be done, or else the car junked. A gas tank leaking because of a rusty seam will be undrivable after a while, if left untreated.


Related Posts Plugin for WordPress, Blogger...