Sunday, October 16, 2022

My 2005 Scion xB: Update #4

 Replacement all shocks and springs.


I was watching my box driving away, with my brother's family inside it, and I noticed it was riding very low in the back. I assume that the rear springs were fatigued after 18 years. (I suspected that the 1400 lbs. of flagstone, I had previously loaded into the back, over about 6-7 trips had some effect on those old springs), however, It seemed to look normal while parked, or driving with no backseat passengers. But I decided it was time for new parts.


I ordered a budget, after-market kit, of loaded front struts, and rear shocks from Ebay.


I couldn't find any after-market, non-lowering springs online, so I ordered O.E. rear springs, from a Toyota dealer in Massachusetts. It was cheaper than I could get locally.


The old rear shocks and springs - You can see how rusty the whole rear axle assembly is starting to look after 18 years as my winter/daily car. Seems to still function fine though.


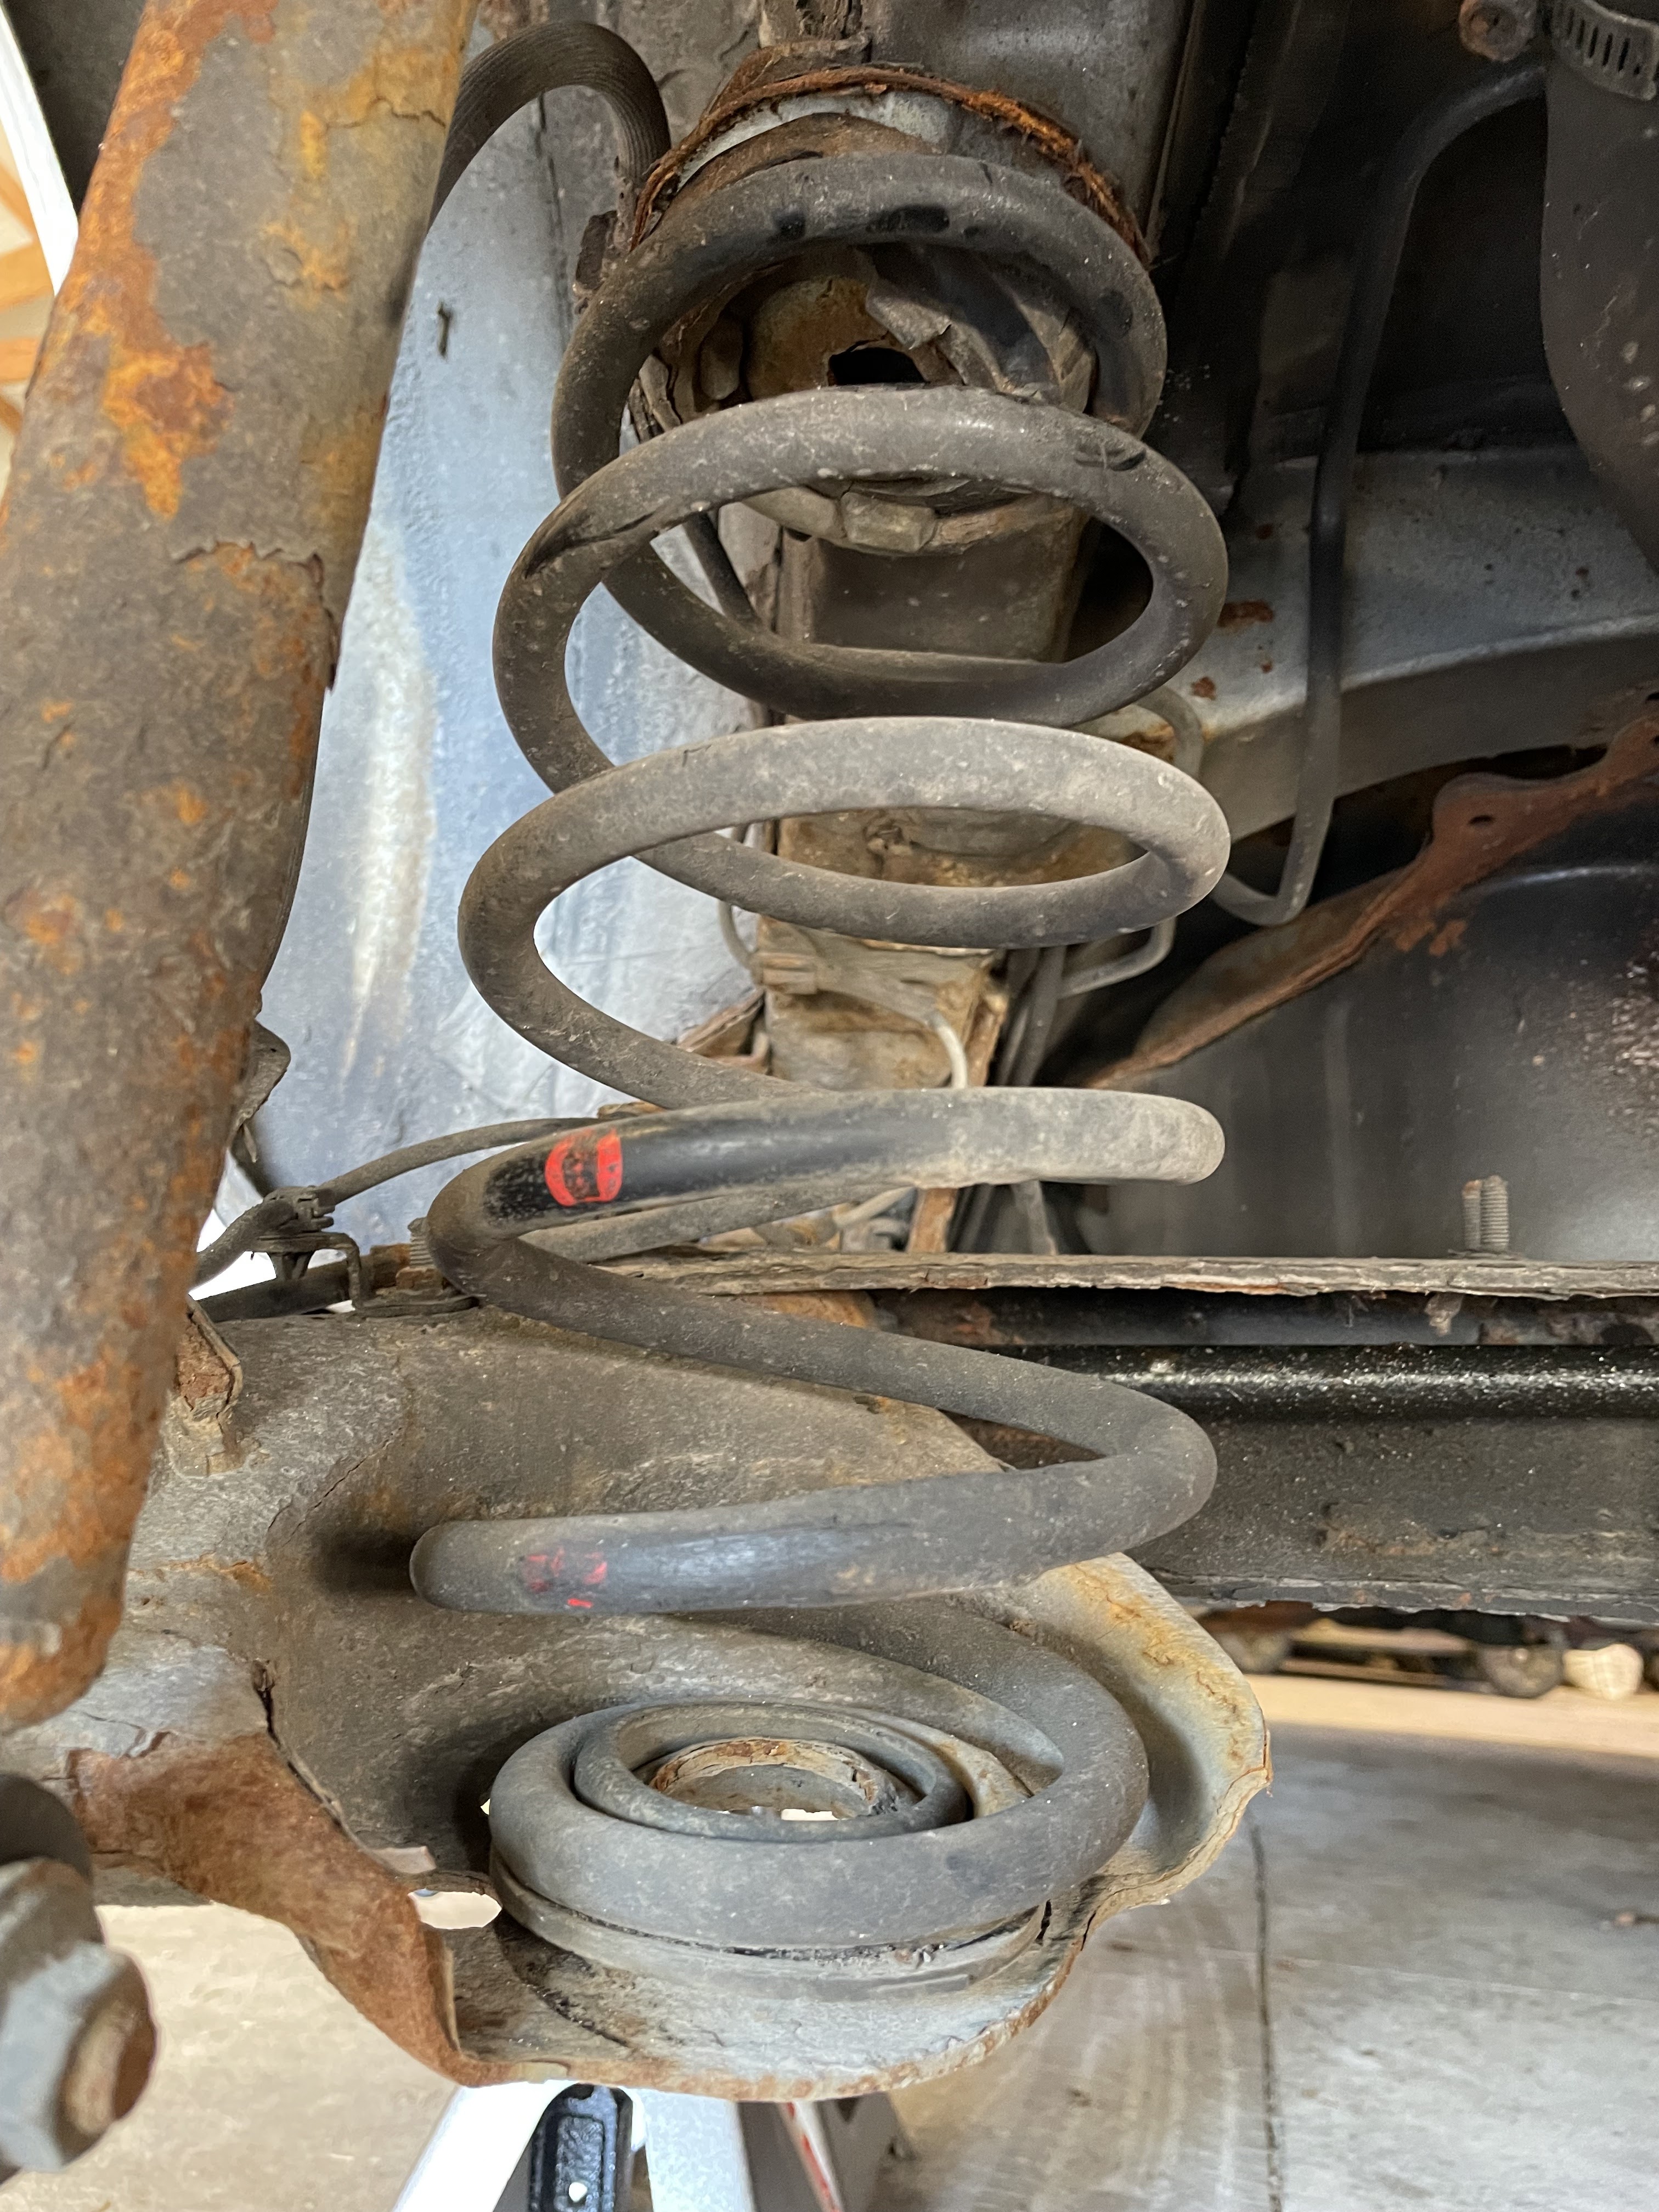
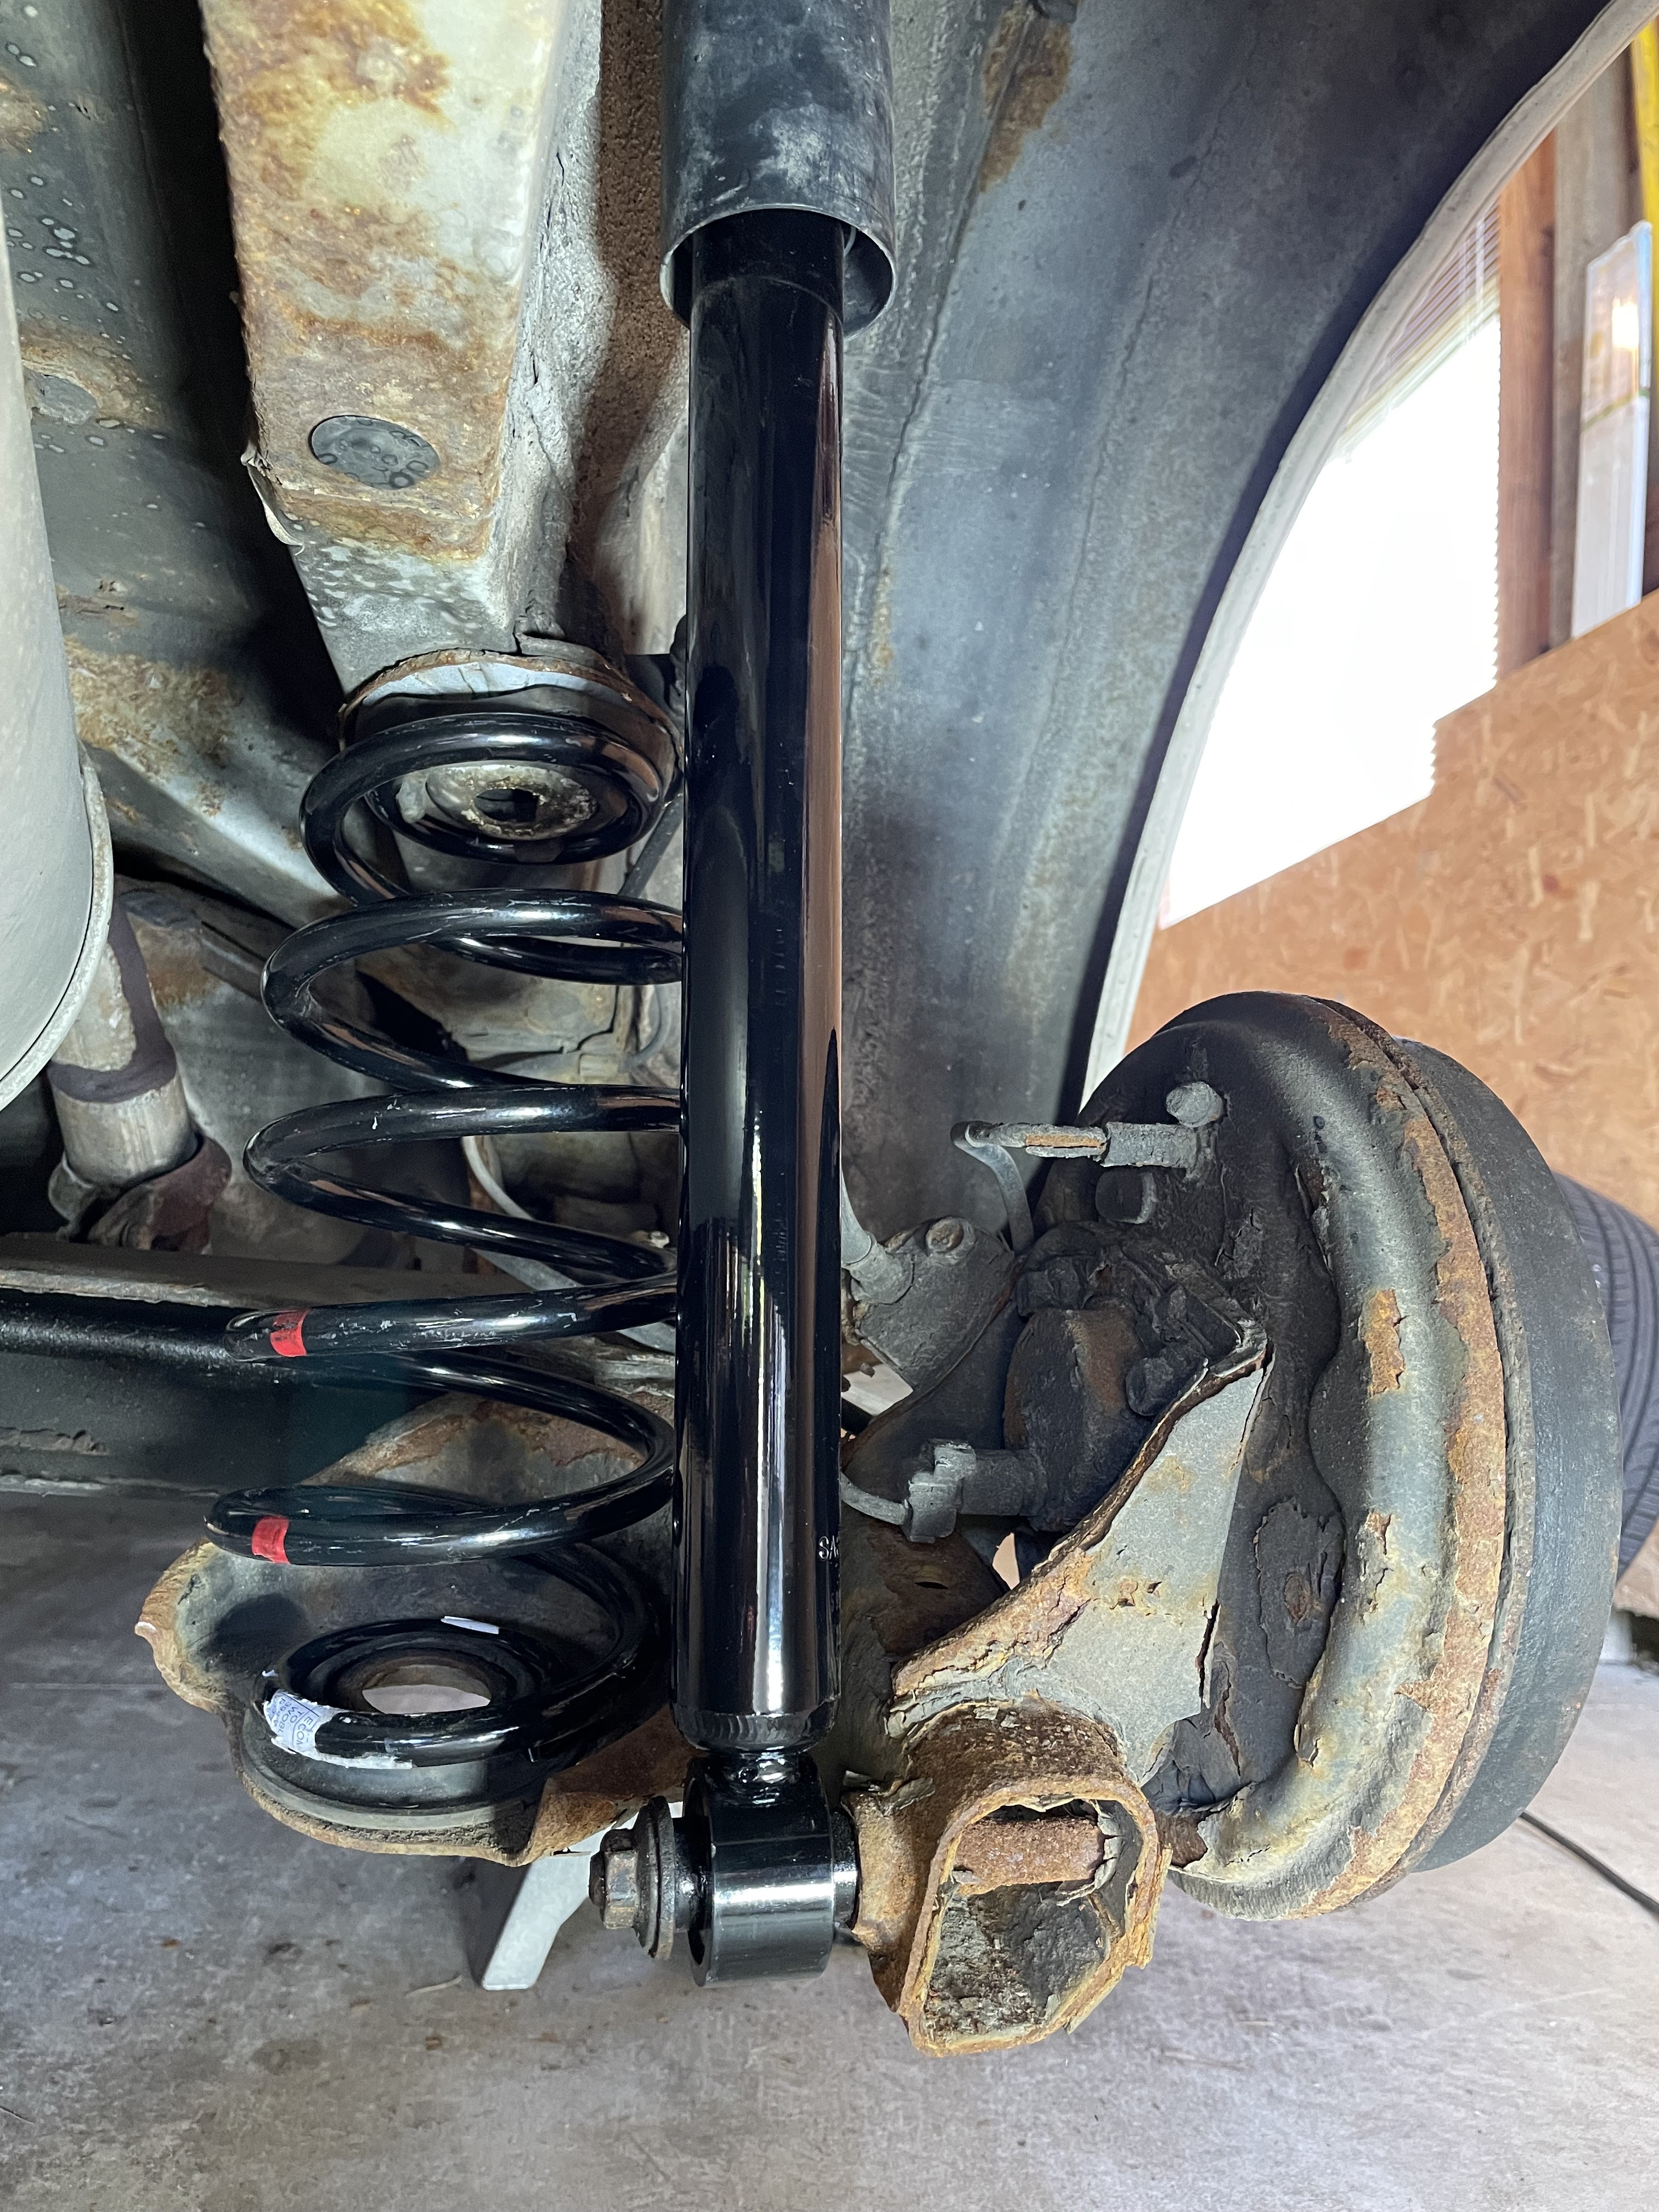
Old and new, rear shocks, and springs.


To change out the rear hardware: I disconnected the rear shock, and used spring compressors on the old, and new springs, so I didn't have to press down too hard on the rear axle assembly, to change them out, (thereby not stressing the rear brake hose too much.) Used some blue thread-locker on the bottom shock nut. The top of the shock used a nylon locking nut.


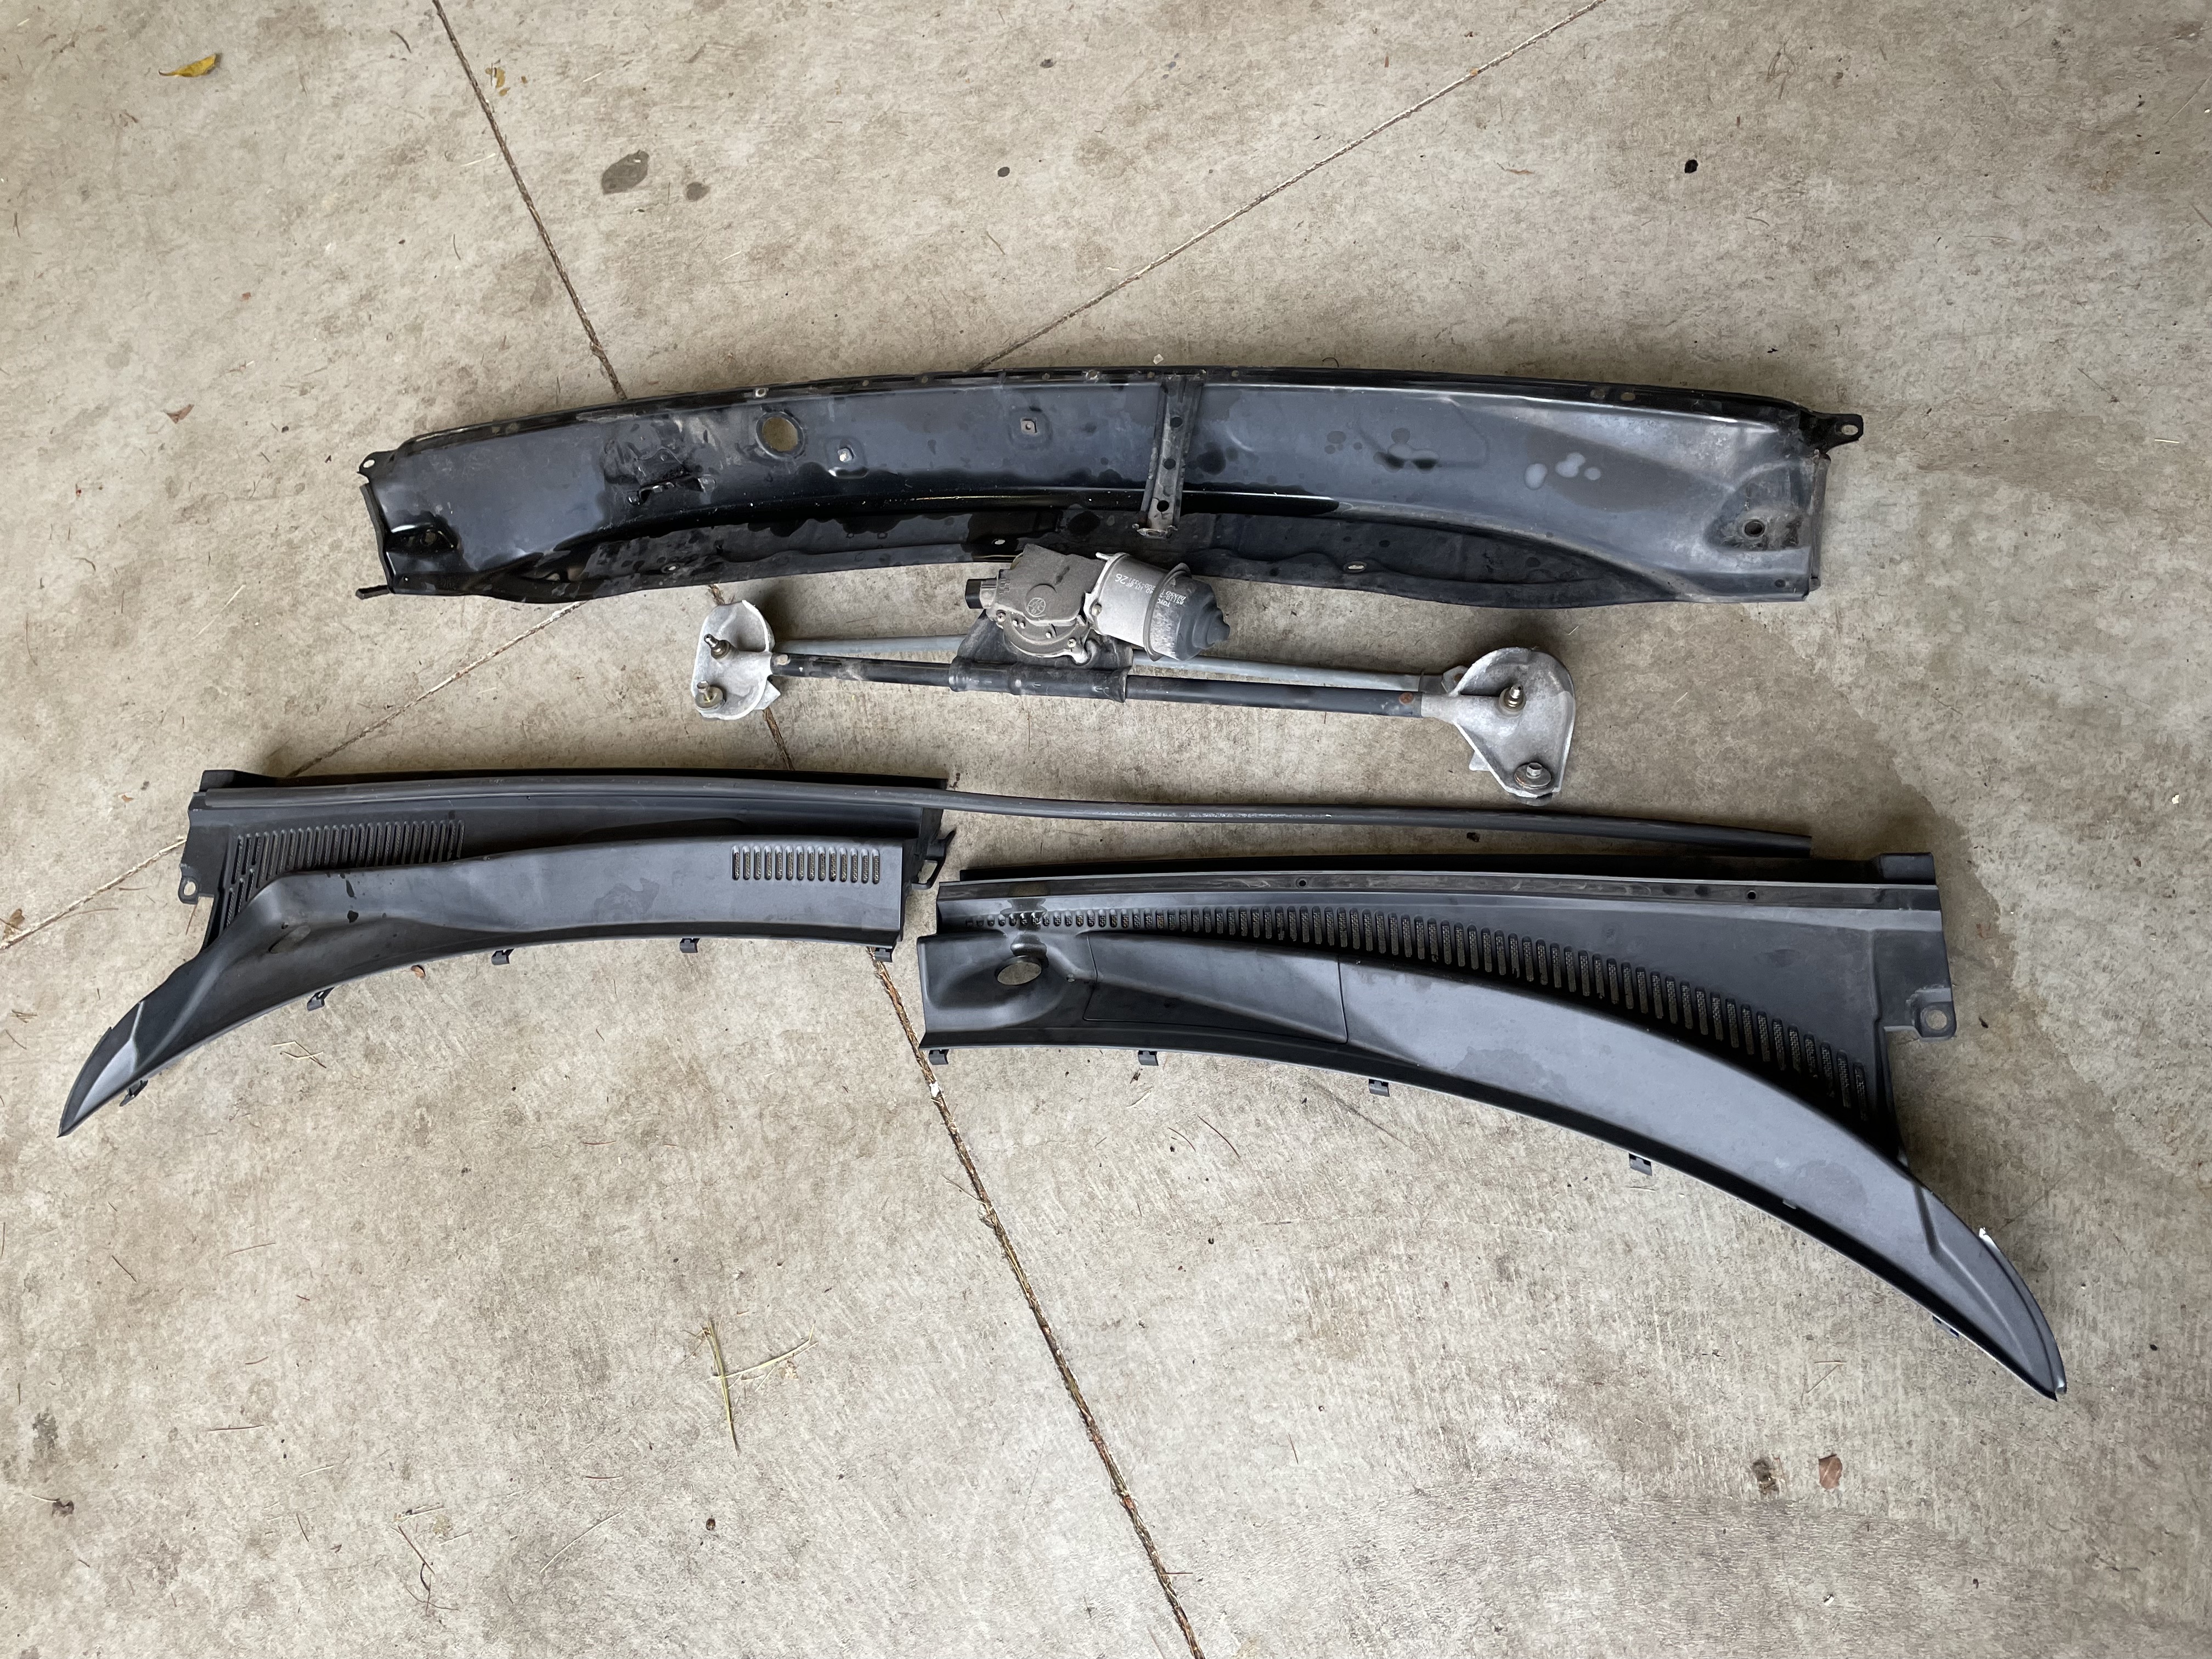
For the fronts, the whole cowl and wiper assembly needed to come out to get at the strut tower hardware. Here is the area looking rusty, and dirty, before, and slightly better after.


Cowl and wiper assembly removed 


Cowl and wiper assembly reinstalled, good to go.


Old and new struts.


The bottom of the new strut connects to the steering knuckle with 2 bolts, (I used blue thread locker). You also need to disconnect a bolt, on the back of the strut, securing the brake hose, and wheel speed sensor wire, and a plastic fastener, for the same wire. Some walkthroughs have you disconnecting the axle nut as well. I didn't find that necessary.


Torque specs:

Front top plate nuts (3 per side) 29 ft lbs.
Front lower strut nuts (2 per side) 97 ft lbs.
Front brake hose bolt (1 per side) 22 ft lbs.
Rear shock top nut (double nut to lock) 18 ft lbs.
Rear lower shock nut (1 per side) 36 ft lbs.


Project cost:

Loaded after-market strut kit from Ebay $183
New Toyota O.E. rear springs $216
Front alignment $73

Total cost : $472

I was curious, so I got a quote from an independent shop, for this job, and it was $2000.


Sunday, April 24, 2022

My 1981 BMW 320i: Update #1

 All differential seals, and O-rings replaced, plus cosmetic restoration.


Rear differential before:


After:


This differential has been leaking fluid ever since it was installed. A mechanic years ago replaced the original diff that came with the car, for a used one, he had, saying mine had "clear signs of wear." 🙄 This one was "weeping" pretty much from day one. Not losing a huge amount of fluid, but unsightly, and leaving oil spots in my garage. I have never done any wrenching on differentials before, so here was my opportunity. I opted not to replace the bearings, as I think they were fine, and I didn't want to expand this project past what it was already.


You can see how dirty, and oily, the rear axle area is, from leaks that are at the pinion seal, and both output seals. Not doing their job, after 40 years.


Differential before removal:


Differential out.  Looking rusty, oily and dirty. I'm guessing this was NOT a California diff.


Output seal ready for removal. The output flanges pop out with a little pry bar action. They are just held in place by internal C clips. I did one side at a time, for fear of it self-combusting, if I removed too many connections between the case and the internals.


Used some HondaBond (light grey) I had lying around, to coat the outer edge of the seal before installation. Red tacky grease on the lips of the seal. The rubber O-rings also attach to these flanges.


Looking inside at the ring gears which will stay put. About to clean up the rear mating surface of the case.


Trying to figure out how to remove the pinion seal. From the rust... I couldn't tell where the seal ended, and the housing began. This didn't want to budge after 40 years, so I bough a seal puller for about $8 and managed to work it around, and wrestle it out.

Old pinion seal:


Old seal removed:


New pinion seal in. 

Coated the outer edge with HondaBond, and filled the inside recess of the seal, with red tacky grease, so the spring would not pop out, while I hammered it into place. Filled the sealing lips with red grease, that make contact with the input flange shaft.


I had the cast iron case, and aluminum rear cover, media blasted, from a company called "U-spray". Then I rattle-canned it with, Rustoleum professional primer, and gloss black/aluminum. I used a bead of Ultrablack RTV to seal up the rear cover. I replaced the 2 aluminum sealing washers (22mm I.D. 27mm O.D.) for the drain, and fill, plugs., and filled it with 1 QT. Valvoline 80W-90 Gear oil


Before:


After:


Before:


After:


Before:


After:


Installed back in the car.

I chased all the threads, everywhere, and cleaned them as best I could. I applied Threadlocker blue, to every connection, and torqued to spec. My torque wrench wouldn't fit to connect the input flange, to the driveshaft, so I had to do that with a box end, by feel.


Torque specs:

Diff rear cover: 31 to 35 ft. lbs.
Side output covers: 14.4 to 17.4 ft. lbs.
Pinion nut reinstall: just indexed, and counted threads
Fill and drain plugs (with aluminum washers): 35 ft. lbs.
Diff mounting to subframe: 62 ft. lbs.
Input flange to driveshaft: 52 ft. lbs.
Diff to hanger (all bolts): 62 ft. lbs.
Output flanges to half shafts: 23 ft. lbs.


Project cost:

Media blasting case and cover $127
Gear oil $10
Sealing washers $10
new pinion locking plate $16
New pinion seal $7
2 new output seals $20
2 new rubber O-rings about $10
Miscellaneous new bolts $10
spray paint - on hand
Permatex RTV $6

Total $216


Click here to see my original blog post about this car.


Tuesday, April 5, 2022

In My Garage: 1981 BMW 320i


My 1981 BMW 320i, E21 ...The first 3 series

I'm finally getting around to adding this car to my blog. I bought this car in August of 2006. I flew out to San Francisco and bought it at a car dealer in Daly City. It had spent it's whole life in the Bay Area of California. It was, and still is, a rust free car. It had 199K on the odometer. Bought it for about $2,100 after taxes and fees. I drove it back to Milwaukee over 3 days. On the drive back, I discovered that the odometer was broken. I guessed, from looking at its history of mileage, during yearly registration, that it probably had about 260K miles on the car. The engine is a 1.8 liter, engine code = M10, factory crank HP 125. This is the same engine used, for at least the previous decade, in the BMW 2002, however by this point, it was fuel injected.


When I bought this car, I had very little wrenching know-how. So I have had a few different mechanics work on it, and it actually had been a challenge to retain technicians to work on it, simply because most shops have no interest in working on cars this old. I myself, will do as much, of the work as I can, going forward.


I probably had spent about $11-13K on parts and labor, for repair and upgrade work, since I bought it.

List of things done:

  • front control arms replaced
  • right rear fuel tank replaced (still leaks for a bit when filled up completely)
  • both rear brake fluid cylinders replaced
  • Ignition coil replaced
  • used differential assembly replacement 
  • 1st custom Magnaflow exhaust (no cat)
  • 4-1 stahl header
  • custom exhaust redux
  • A/C removal
  • Bilstein shocks and H&R sport springs install
  • changed wheel and tire package
  • 320is factory front lip
  • Rebuilt alternator
  • both front caliper replaced
  • another new passenger side caliper, a few years later (they seize for some reason)
  • custom engine damper installed
  • new horse hair drivers seat cushion from BMW
  • drivers side repainted (just to clean up a few dings and imperfections)
  • baseline plus after, dyno


Getting the car dynoed at King Motorsports, in Brookfield Wisconsin.
That's the owner Scott, adjusting my A/F mixture as it was running too lean.
Max HP = 90.25
Max torque = 91.24


Some oil weeping, could use some new minor gaskets


Bought 5 BBS basketweaves, (that included one full size spare) they were the factory wheel that came on the 320is, of the same era, for $175 from a guy in Chicago. Also bought a 320is front lip off Ebay for $151


Introduction video about the first 3 series


Related Posts Plugin for WordPress, Blogger...